ECA Frequently Asked Questions
What's New in ECA 5.x?
How do I convert my data from a previous release of ECA to ECA 5.x?
Can I move my ECA program and data to a new PC?
Can I use ECA on my home computer or laptop?
Can ECA support split classes where one teacher has children from two or more grades?
Can I fine tune the class lists without reshuffling all students?
Can ECA handle adding students that register at the last moment after class lists have already been made?
What if last minute registrations make it necessary to add a new teacher just before school starts?
Is it better to use Separation Lists or Separation checkboxes?
My separation values are not as equal as I was expecting?
ECA can't seem to find my import file even though I have copied it to my C:\ECAWIN folder.
How would you use the new Student ID field?
When would you use the new RANK reports?
When would you use the "delete all students" in selected grade function?
When would you use the new "Blank Configuration Report"?
How would you use the new Room number field?
If I am running 4.0 can I still get support?

A: 5.0 New features:
- New Save to PDF report preview option on all reports
- You can electronically distribute (email) reports
- New select target path button for Backup and Restore utility options
- New ECA Installation Path utility option to display ECA Installation Path
- New Copy Configuration button added to Configure Grade screen
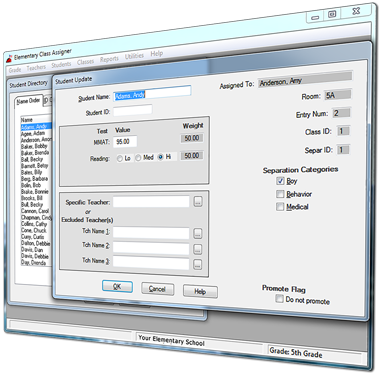
- New "Assigned To" teacher value displays on the Student Update screen
- Support for Microsoft Vista and Windows 7 added
- Improved Help and Documentation including new Special Considerations section
- New HTML Help (.chm) file format which is required for Vista and Windows 7
5.1 New features:
- New Automated Backup routine added at strategic points within ECA (before Promote, Build Classes and Rebuild Classes)
- New Backup Management procedure to manage Automated Backups including Restore, New Backup and Delete Backup functions
- New Student Import and Export support of field labels which will aid in identifying columns
- New Teacher Import and Export support including support for field labels
- Modified Student CSV File field description to use familiar Excel columns format
5.2 New features:
- Added variable weighting to test scores
- Added LO/MED/HI choice for test scores in addition to range
- Added variable range values for test scores
- Modified Grade Configure screen to allow for test weighting a variable test scores
- Added Student Re-average function to recalculate test averages after adding new tests or changing weighting
- Modified Student Update screen to display test weighting
5.3 New features:
- Added new separation criteria for teachers to allow affinity with student separation criteria
- Added Separation fields to Teacher Report
- Added class totals to Class Detail Report and Classes Detail Report
- Installation support for Windows 10
5.4 New features:
- Added code to prevent screens from not displaying due to faulty INI position settings (the application would appear hung during this behavior)
- Added backup and restore of ECAGRADE.TPS file so that customized grades would be honored if being restored to a different PC
- Added new Report Previewer
- Added additional help and manual text to encourage backing up to a medium not on the local hard drive, such as a flash drive, network storage folder or Cloud storage such as Dropbox or OneDrive
- Altered report fonts
5.5 New features:
- New Student Import Wizard allows matching import field labels with your Student CSV file columns
- New Teacher Import Wizard allows matching import field labels with your Teacher CSV file columns
- New Import routine adds editing and logging to import data
- New logs created for Import functions to help identify issues
- New auto-select Grade feature which pre-selects grade used in the previous session
5.6 New features:
- New Multi User support to allow concurrent use of ECA by multiple users (optional)
- New Grade Ownership manager to aid in Multi User support
- New File in-use warnings to help identify sharing issues in Single User mode
- New per user custom Font Size Selection for easier ECA screen viewing
- New option to direct Classes report to a CSV file rather than a PDF
Q: How do I convert my data from a previous release of ECA to ECA 5?
A: The preferred method of converting data is to restore the data from a current ECA data backup made on your previous release. If you do not have a current ECA backup, you can create one by running your old ECA version, then select UTILITY|BACKUPS from the main menu.
- Run ECA 5.x from Windows
- Select UTILITY|RESTORE from the main menu.
- Specify drive and path of your current ECA backup data. Data can be in a folder or flash drive.
- Select the "All Grades restored" radio button.
- If you are upgrading from a release prior to ECA 4.0, then check the "Restoring pre-ECA 4.0 files" checkbox, then press OK.
- Restore should copy files from your backup folder or flash drive to the ECA 5.x directory and make the files available for use.
- You will need to run CLASS|BUILD to rebuild the ACCUM files needed for some of the reports.
If you do not have a previous backup, but have the data files from the previous release (data files start with the grade prefix and include gCONFIG.xxx, gTEACHER.xxx, gSTUDENT.xxx, gSEPAR.xxx, and gACCUM.xxx), then copy these files from their existing folder to a new temp backup folder (i.e. C:\ECABAK\. Follow the steps above using C:\ECABAK as the backup data. NOTE: If your old files had a .DAT extension, then these are pre-ECA 4.0 files and you will need to check the "Restoring pre-ECA 4.0 files" checkbox in step 5.
Q: Can I move my ECA program and data to a new PC?
A: ECA is governed by a single Concurrent Use subscription. So as long as the software is not going to be used by more than one person (if you have a single subscription) then you can move the ECA program and data to a new PC. The steps to do so are outlined below:
- The first step is to make sure that you have a backup of your ECA data files. If you don't, you can obtain one by opening the Utilities pulldown on the ECA Main Menu and selecting the Backup option. We recommend using a flash drive or shared network folder for the target of the backup, so you can easily restore the data files to the new PC.
- Locate your ECA5x.MSI file. If you can locate it, copy it to your new PC (desktop or temp folder). Or If you cannot locate ECA5x.MSI, then this file can be downloaded from our web site directly to the new PC.
- From the new PC, run ECA5x.MSI. This will install ECA on your new PC. You will need a valid subscription key in order to activate the product once it is installed on the new PC.
- After ECA has been installed and successfully activated, then you can restore the backed up data files. Do this by opening the Utilities pulldown on the ECA Main Menu and selecting the Restore option. Select the location of the backup data (flash drive or shared network folder) created in step 1.
- ECA should be ready to use. We suggest you re-index the student files by opening the Students pulldown and selecting Re-index for each of your grades. You should also do a Build Classes by opening the Classes pulldown and selecting the Build Classes option for each of your grades.
Q: Can I use ECA on my home computer or laptop?
A: Again, ECA is governed by a single Concurrent Use subscription. So as long as the software is not going to be used by more than one person (if you have a single subscription) then you can copy the ECA program and data to your home PC or laptop. Follow the steps 1-5 above, except you will install the software on your home PC or laptop and then restore the data files on your home PC or laptop.
Q: Can ECA support split classes where one teacher has children from two or more grades?
A: Yes. For split classes, ECA assumes you know the students you want to have in this special environment (age, maturity, etc.). The following info from the help topic Building Split Classes describes the steps:
- Define the Teacher(s) to teach the SPLIT class(es) in each of the grades to be SPLIT by selecting the "Limit" option
under the "Limit Class Size" box and by specifying a value for "Target Size" which matches the number of students for the current grade desired in the class. Repeat for each grade.
- For each of the students you want to assign to the SPLIT class, use the Specific Teacher field on the "Student Update" screen to assign the student to the Teacher of the SPLIT class. Repeat for each grade.
Q: Can I fine tune the class lists without reshuffling all students?
A: Yes. If you have just a few students to move, simply select those students and enter the specific teacher where you wish the student to be. When finished, run Build Classes and the lists will be modified to reflect the movements you made without altering the remaining students.
Q: Can ECA handle adding students that register at the last moment after class lists have already been made?
A: Yes. Simply enter the new students and run Build Classes and the new students will be evenly distributed to the existing teachers.
Q: What if last minute registrations make it necessary to add a new teacher just before school starts.
A: Add the new teacher and run ReBuild Classes to resdistribute ALL of the students.
Q: Is it better to use Separation Lists or Separation checkboxes?
A: You will usually get better results.from using Separation Lists as opposed to checkboxes. Save the checkboxes for really large groups such as "Boy" or "Behavior" and try to use Lists for smaller groupings.
Q: My separation values are not as equal as I was expecting?
A: There are several possible causes.
- You have too many specific or included/excluded teacher requests. The program cannot spread out the remaining students to balance the separation, if you have too many specific request. Solution: try to reduce the number of specific requests.
- You have too many checkboxes (especially with students that have multiple checkboxes checked). The checkbox order determines the priority for distribution with the top checkbox being the highest. The problem occurs when the program tries to balance the checkboxes near the bottom, but all (or most) of the students in that category have already been placed because they have checks in higher categories. Solution: try to reduce the number of checkbox categories using separation lists instead.
Q: ECA can't seem to find my import file even though I have copied it to my C:\ECAWIN folder.
A: Usually this problem is caused by the file type being hidden. Most files have an extension (such as .TXT or .CSV), but there is a Windows option to hide known file types. To see if this is the case, open the C:\ECAWIN folder and try to find the Folder Options function. Check all of the pulldown choices at the top of the screen. In Windows 10 the Folder Options is found under the View tab under Options. Once the Folder Options screen is open, select the View tab and look for the "Hide file extensions for known file types" checkbox and make sure it is UNCHECKED. Once it is unchecked, you should be able to view the file type for the file. Enter both the file name and type (ie. 1STUDENT.TXT) in the import file field in ECA and ECA should be able to find it.
Q: How would you use the new Student ID field?
A: The Student ID field lets you report or cross-reference students by their student id. It can be up to 9 characters in case you use social security number.
Q: When would you use the new RANK reports?
A: The RANK reports make use of the test score fields and sort students according to the average of their test scores (highest to lowest).
Q: When would you use the "delete all students" in selected grade function?
A: The "delete all" function is most valuable while you are creating test scenarios during your initial setup. You can delete all of the students for the selected grade and start over.
Q: When would you use the new "Blank Configuration Report"?
A: You can print out a blank configuration form and give it to your teachers to fill out for the students in their grade, then use the returned forms for data entry. You may be using a similar form now, but our new one guarantees that it will match the grade configuration within ECA (in case you make changes).
Q: How would you use the new Room number field?
A: The room number, which is associated with a teacher, lets you more easily locate a student in case of an emergency or other lookup need. The room number shows up on the student record as well as reports involving student detail.
Q: If I am running ECA 4.0 can I still get support?
A: Free support is not available for ECA 4.0 or below. Support is only available during free trial period and for users with an active registered ECA subscription.